A few weeks ago, I wrote a blog Tying Spey Flies – I’m Scared!
Well, I’m back to report I’ve successfully tied another spey fly! Actually…two.
If you recall, I wanted to tie some spey flies and settled on the Lady Caroline, an old-time pattern from the 1800’s.
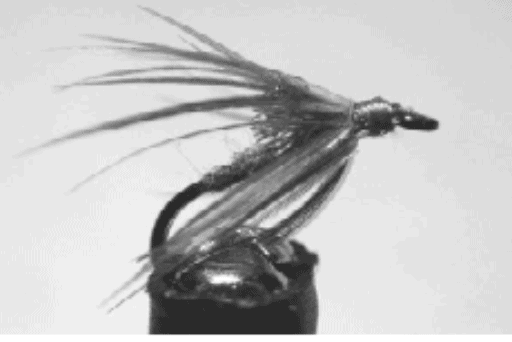
Here was my first fly:
I didn’t like the proportions of the tinsel, the amount of hackle (over-hackled), angle of the bronze mallard and thought I’d take another shot at it.
This must be what it’s like to start tying flies…oh, that’s right I AM fairly new to tying spey flies.
Remember the questions I had when I tied my first Lady Caroline?
- How to tie a fly with blind eye hook? It’s old school…hooks didn’t use to have eyes. Eyes were created using silk gut tied on the front of the hook.
Well, I got past the blind eye deal. I’ve been using 30# dacron fly line backing and saving the silk gut until I tie a few more flies.
- What feathers should I use for the heron substitute?
That was a problem…heron is illegal in the US. The substitute is blue eared pheasant, a beautiful feather. But those feathers can be expensive. I used a blue eared substitute – guess that makes it a heron substitute twice removed!
- What is the proper hackle length?
When I tie trout flies, I really focus on proportions. What I’ve found in my short foray into spey flies is it all depends on the tyer…and what feathers they are able to find.
- How many wraps will I get with a specific feather?
And this question is VERY important. I failed a time or two. You guessed it…I ran out of hackle at the end and had to start over. Have you ever had that sinking feeling in your stomach? Well, I’m still working on how to make the proper feather selection. That comes with practice.
- Where should I tie in 3 different tinsels…side, bottom, side? And in what order?
I struggled with this for a while. Finally remembered that when tying trout flies, the first material tied in will be the last material wound forward. That caused some problems… which leads to the last question…
- What spacing should I use to get the standard 5 turns for each tinsel?
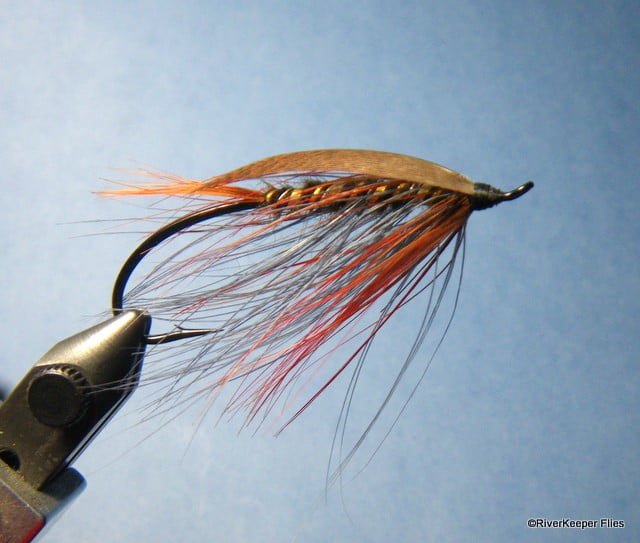
After watching a couple of videos, I learned the third turn should be in the center of the hook. Well that helped! I was able to segment the fly and wrap the tinsel in a proper proportion. I like the last fly I tied because of that.
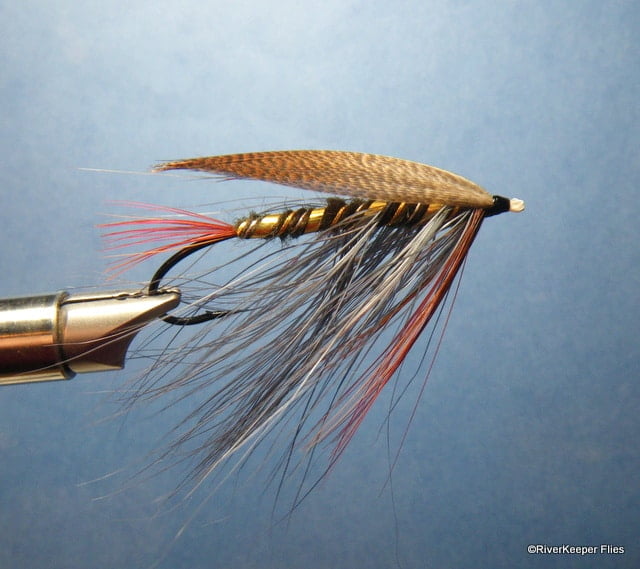
But…it helped me determine where to tie in the blue eared pheasant feather. Yup, I did use one of those (I have a small bag with 6 – 8 feathers). I found if I shortened the body the feather didn’t need to be as long and I’d have enough hackle to complete the fly. I tried it on a “fishing fly” with a normal eyed hook.
I like the shorter body anyway from a proportion standpoint.
And remember for all you beginner fly tyers my comments about using the proper materials? Well, I continued to have a problem because of the bronze mallard wing.
Purchasing paired feathers can be expensive too. So, why not find your own paired feathers? Easier said than done.
Here is the first step:

What to do with a bag full of feathers? Well, start matching right and left feathers for size and color.

Which isn’t as easy as it looks. And see how the feathers are curved? I found it isn’t the easiest to manage when putting them together for a wing. I’d read somewhere to use an iron to flatten them. So I tried it:

It seemed to work. The feathers still retained some curvature, but I was able to place them back-to-back and manage the feathers much better.

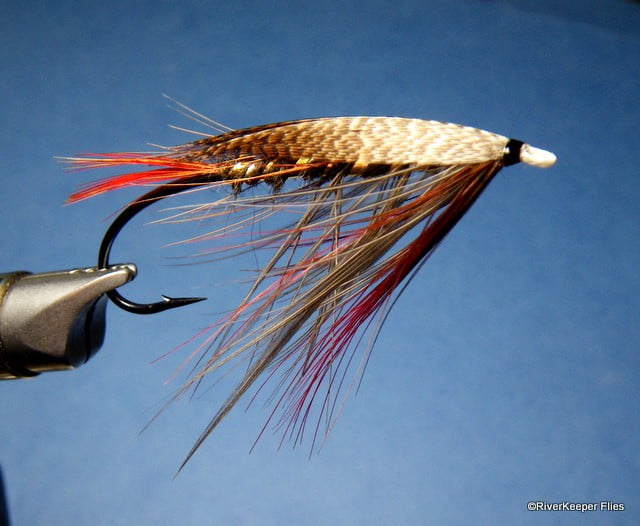
So I found a few that were close and I paired them up. I used one set for the final fly. And here is the Lady Caroline…
And the top view, because of all the work to tie in the bronze mallard!

They’re getting better, but I sure couldn’t make a living tying these flies!
Well, back to the vise and practice.


Beautiful. This one will be on the Central Oregon Fly Tyers Guild Plate for the Expo live auction in March…right?
That’s right Sherry. Proud to have it on the plate!