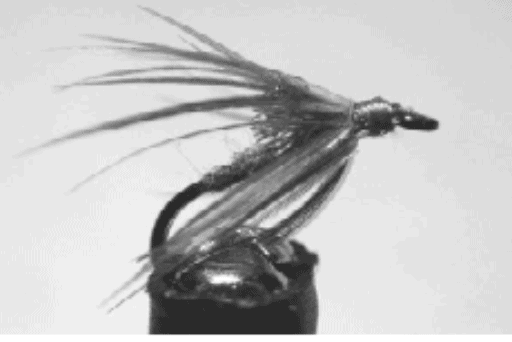
Here is the fly pattern for a Flying Ant.

Here is an image of the top.

Materials
Hook:
Daiichi 1160, size 10-12
Thread:
Danville 70 denier, black
Back:
Black foam, 2mm
Underbody:
Spirit River UV dubbing, black
Wing:
Hackle tips, dun
Hackle:
Black
Thorax:
Spirit River UV dubbing, black
Head:
Black foam, 2mm
Directions
- Begin thread on hook and wind around bend past hook barb.
- Tie in black foam.
- Dub underbody.
- Pull foam over dubbing tightly and tie off. Leave extra foam, creating thicker mid-body.
- Lightly dub over extra foam in step 4 to create larger mid-body. This will prevent wings from splaying upright and will align over foam body.
- Select 2 hackle tips, measure for length and strip off extra barbs. Tie in one at a time, extending over body. The thicker mid-body created by foam and dubbing will help align wings properly. Use a couple soft wraps and pull stem forward to catch a few barbs from the wing. This technique will help align wings in place.
- Tie in another slightly smaller foam extending over body. Attach firmly to point where wings are tied in. This will be pulled forward in step
- Prepare hackle and tie in.
- Lightly dub thorax area and wrap hackle forward with 3-4 turns and tie off.
- Trim hackle on top and pull foam forward over hackle. Tie off just short of hook eye.
- Whip finish.
- Trim foam extending over eye, leaving small bump for head. Cut each side of foam to create small head.
- Trim a “v” on the underside of hackle to create legs and allow fly to sit lower in film.
Tyer notes:
- Used Collins medium dun for wing tips.
Here is a video from my RiverKeeper Flies YouTube channel where I demonstrate how to tie the fly: