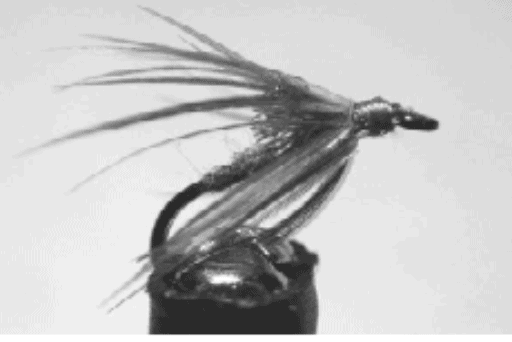
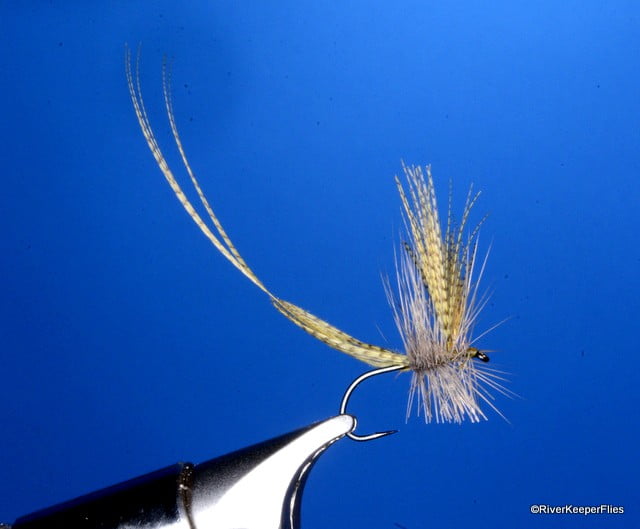
Here is the fly pattern sheet for the Hatchmaster Green Drake.
And a variant of the Hatchmaster Green Drake.
Materials
Hook:
Daiichi 1310, TMC 100 #8 – 14
Thread:
8/0 olive
Body:
Mallard flank dyed olive
Hackle:
Dun or barred dun
Directions
- Begin thread on hook and wrap back to hook point.
- Select mallard flank feather and stroke most fibers back.
- With fibers stroked backwards, hold them slightly toward you and place a soft thread wrap over hackle. Thread torque will position feather on top of hook.
- Continue to wrap thread forward with touching turns while holding feather. Stop at 75% mark. Pull remaining feather straight up and place several thread wraps in front of feather to prop upward. This will create the wing.
- Prepare dun hackle and tie in behind wing. Move thread forward to tie off point behind eye.
- Wrap 4 or 5 turns of hackle behind wing and 2 or 3 turns in front of hackle. Tie off and trip hackle.
- Whip finish.
- Trim wing to length.
- Trim tail by keeping 2 or 3 fibers on each side of stem.
Here is a link to my RiverKeeper Flies YouTube Channel demonstrating how to tie the fly:
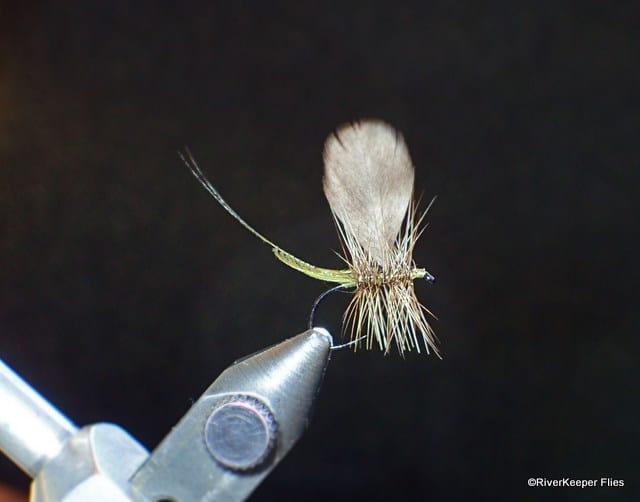
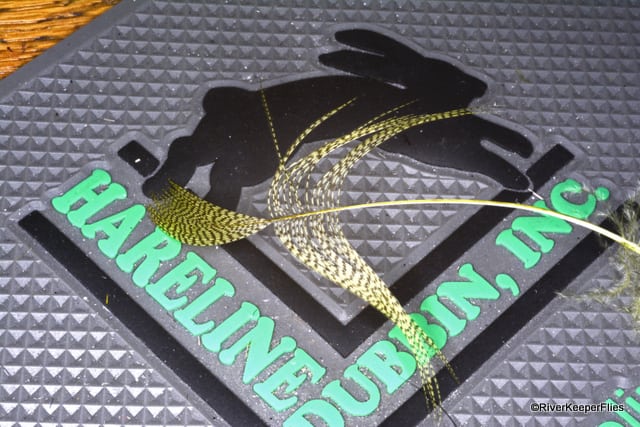
Here are a few pictures to show how I tie the fly.
Mallard flank feather with equal length barbs on each side of stem.

Strip off bottom fluff from stem.

Separate fibers for proper body size, about the length of hook shank.

Remove excess barbs.
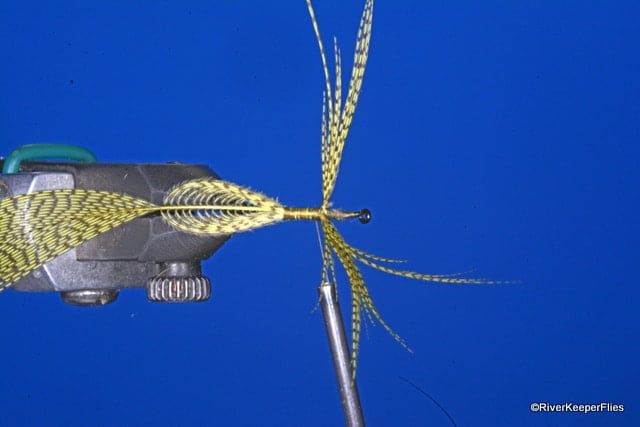
Create body by attaching feather to hook. For flies of this size, I add a slim dubbed body to eliminate feather from rotating around hook.

Continue wrapping thread forward with touching turns while holding feather up to keep on top of hook.

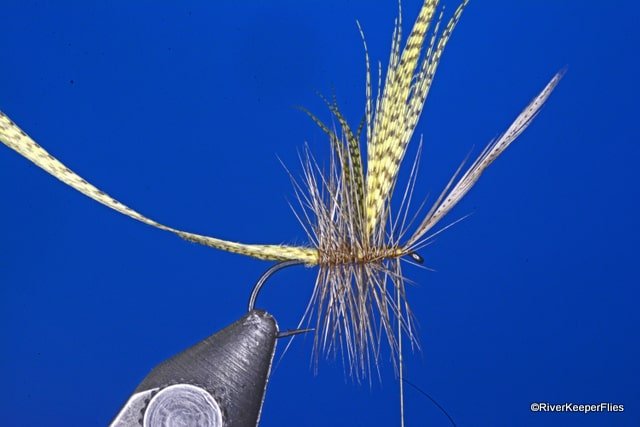
Trim stem and split remaining barbs into equal parts to make two wings. Use figure 8 thread wraps to separate. On larger flies like this one, I place several thread wraps around each wing to help bring fibers together.
Bring thread back to tie in hackle.

Wrap hackle forward using 4 – 6 wraps behind wing and 2 – 5 wraps in front of wing.
Trim hackle and whip finish. Trim hackle even with hook point.
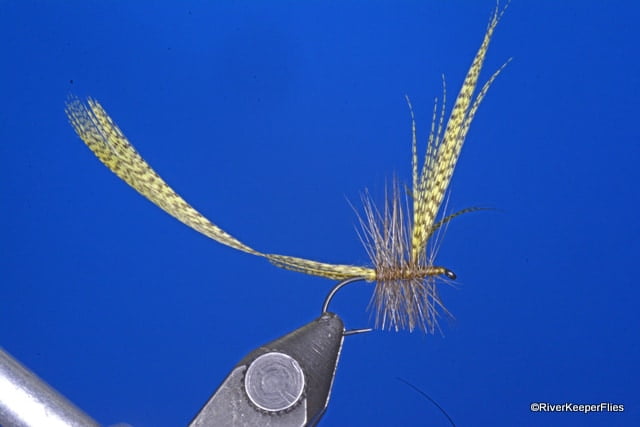
Trim wings to length.

Cut tail fibers.

For more information about the Hatchmaster fly, be sure to check out my Throw Back Thursday Fly of the same name.