Here is the fly pattern sheet for the Miracle Midge.

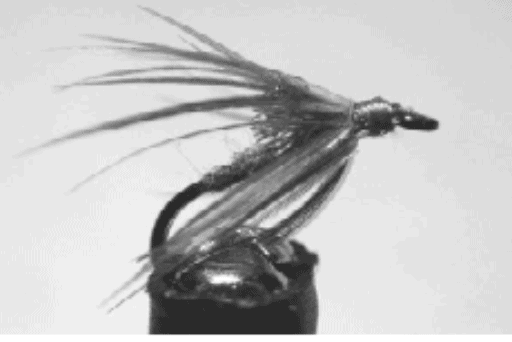
Fly in progress

Same fly from above – wet.

Materials | |
Hook: | Dai Riki 135 or TMC 2487, size 16 – 20 |
Bead: | 2 mm silver tungsten, small silver-lined hi-lite glass bead or size 11 glass pearl bead |
Thread: | 8/0 Uni or UTC 70 denier thread (see below) |
Rib: | Small copper or gold wire |
Overbody: | Single-strand white floss |
Body: | Thread colors – peacock blue, gray, fluorescent pink, black, red, yellow, and light cahill |
Directions:
- Debarb hook and attach thread near the eye.
- Attach a 4-inch piece of rib material. Then attach a 4-inch piece of white, single-strand floss.
- Pull both the rib and floss along the shank and advance the thread in close, touching wraps to the hook bend.
- Return thread back to hook eye and secure with half hitch.
- Wrap floss to the hook eye and secure with half hitch. Be sure the floss flattens out and covers the thread when wrapping.
- Rib the body with 4 to 5 turns of wire and secure near the eye.
- Color about 4 inches of tying thread with a black marker and make small black head. Secure with a 4-turn whip finish knot. Put a drop of head cement on the head (not floss).
Note: Even though the fly will look white in your fly box, it will turn the color of your tying thread when wet. Peacock blue is a favorite color, but pink, red, and black work.
Substitutes: Substitute white Stretch Flex (or similar brand name) for the floss. When pulled tight over the tying thread you will see the thread color (fly doesn’t have to get wet). Another alternative is to substitute 2 strands of UV Krystal Flash for the floss. In both cases, coat the entire fly with head cement (like Fusion glue) or Sally Hansen’s Hard as Nails.
“It’s a Miracle (Midge, that is). The predominant aquatic macroinvertebrates (bugs!) present in the drift during the winter months in the Crooked River and other Central Oregon tailwater fisheries are midges. Anglers can count on midge larvae in the drift of tailwaters 24 hours a day, 7 days a week, and 365 days a year. Even if you do not see midges hatching (they are really small sometimes) on the river, that does not mean that midges are not present in the drift. They are present; many times in the thousands. Likely, this time of the year, when you see the flash of a feeding fish, you can bet they are feeding on midges.
There are hundreds of subsurface midge fly patterns. The Miracle Midge has been around for a while. Ed Marsh, a Colorado angler, originated the pattern for those tough Front Range tailwater trout in Colorado. It is great pattern for imitating midge larvae. This winter, my fishing partners and I have had phenomenal success fishing midge larvae and pupa patterns. Over 95% of the fish I’ve caught (mostly redbands) have been caught on one fly (the Miracle Midge) and one color (peacock blue). I provide here the recipe for the standard tie, but, as you would expect, I also suggest some modifications to the materials used in the pattern to increase its durability and effectiveness. I use a size 18 pattern in both straight and curved hooks—both work equally well. I use a size 20, but have found fishing success no better than the size 18.
I fish two flies under a small indicator in slow to moderately slow water, 9 inches to 4 feet in depth. My point fly (closest to the stream bottom) is the Miracle Midge. I fish a size 18 Deep Blue Poison Tung as a dropper to serve as a pupa pattern. Blue is a great color for winter midge imitations. In shallow water (less than 2 feet) in riffles and tailouts of pools, I usually rig my flies “inline”. The two flies are attached using loop knots. I try to keep the loops about ½ inch in size. The weight is attached to the tippet above the point fly on a 6 to 9-inch piece of tippet material with a clinch knot. It is important to attach the weight below the point fly. Also, when flows are low (75 cfs) as they are this winter on the Crooked River, use a size 1 shot. If more weight is needed, add a size 4 shot. Do not overweight the rig. In deeper water, I attach the dropper fly on a 4 to 5-inch tag. In all cases, adjust the distance between the indicator and the weight to equal or just exceed the water depth. The distance between the two flies should be around 15 inches.” – Bill Seitz